Monday 28 June 2010

Researching a photo album: (2) Documenting the album and photographs

documentation01

Once I’ve created a digital photographic and scanned record of an old photo album, the next step for me is usually to provide accompanying documentation of the images.  This record will provide an underlying reference system to the research which follows.  In my experience, it is all too easy to seize on a name written on the back of one of the photographs and away I go.  The risk is that I will often get carried away by the excitement of ongoing discoveries, and this important part of the process will fall by the wayside.

documentation02

I prefer, therefore, to at least start in as methodical a fashion as I can.  That way, I hope to reduce the chance of ending up with a mountain of discoveries, with no easy way to sort out the relevant from the spurious.

From a genealogical and socio-historical point of view, I feel that it’s also very important to consider the nature of the photographic collection within the album as an entity with a complex internal structure.  Unless the album has been collated by a photo enthusiast from a variety of non-family sources – and this possibility should always be carefully considered – then the subjects of the photographs will probably have some meaning to the album’s one or more former owners.  The people depicted won’t necessarily all be genealogically related to the original owner, but the owner will usually have had some kind of relationship with them.  In all likelihood, there will also be relationships between subjects.  Indeed, part of the purpose of researching an album – at least for me - is to elucidate such relationships, where they exist, in order to build up a framework on which one can drape the stories of their lives.  I will discuss these aspects further in due course, but wanted to emphasize why I stress the importance of thorough documentation at an early stage.

My methods of documentation have evolved somewhat over time, and indeed are still undergoing periodic modification, so I don’t claim that what I describe here is in any way perfect, or that the approach I use will be suited to every reader. I hope to at least provide some ideas that each may use to establish their own best practice.

Provenance

The origin of a photograph album is very important, particularly if it has few – or no - annotations, as it may provide vital clues to the identities of the portrait subjects.  We are all familiar with stories of how photographs have survived the generations, but have lost all accompanying identification information and context.  It is often a similar story for entire albums and even miscellaneous groups of photographs.  I strongly recommend, therefore, that a special effort is made to document the known history of the album – or Aunt Betty’s shoe box full of loose prints - as far as the researcher is able.

This might merely take the form of a sentence or two, such as:

I, Joe Bloggs, found this photograph album amongst the possessions of my great-aunt (my paternal grandfather’s younger sister) , Julia Bloggs (1892-1971), after she died.  Nobody else in my father’s family knew anything about the album or the people in the photographs.

or it could be far more elaborate, depending on how much can be discovered.  The important thing is that one should aim to preserve all of what is known in as objective manner as possible, making it clear what is established fact and what is conjecture, for any future generations.

albumheritage01

If the album has passed through several hands, as is often the case, then an outline family tree may be useful to illustrate such a history.  In the fabricated example shown above:

I, Joe Brown, was given this album in 2010 by my mother Fiona Brown.  She and my father had inherited it from his sister (my paternal aunt) Freda Brown a year earlier.  My parents had discussed the album over the years with Freda, as it had been passed on to them when Fred & Freda’s parents had died in the late 1970s.  My father thinks he remembers being told by his sister Freda that the album used to belong to their father’s first wife Charlotte Brown née Black.

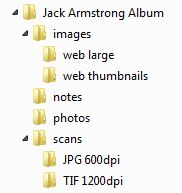
With the particular album that I am currently researching, the donor Jack Armstrong tells me that he bought it at a yard sale in West Chester, Pennsylvania some time in the late 1990s.  At the time, the vendors were unable to provide any information as to its provenance.  Originally, it had the title “Album” in silver-coloured tin plate letters on the cover, but that subsequently became detached and lost.  The fact that the album was “rescued” in West Chester may be irrelevant, as the previous owner could conceivably have purchased it anywhere.

Photograph Index

The next task is to compile an index which will eventually contain a summary of the important information about each photograph.  I use it for reference and analytical purposes, and often keep a print out in the front of the album.  I have used MS Word to create the index, but nowadays I find MS Excel more convenient.  It doesn’t really matter what format is used, but one that is easily shared is preferable.  My index will contain some the following fields.  I’ve highlighted the ones I always include. The remainder I may or may not use, depending on the particular project, and can be regarded as optional.  Other researchers may also wish to use other fields that I’ve not mentioned.

research01

Reference – the file name/number given to the scanned/edited image

research02

Format– The photograph type or format e.g. cabinet card, ferrotype, carte de visite, post card, loose print, etc.

Size – Width and height/length of both the card mount and photographic print, in millimetres, measured with an ordinary ruler. By convention, the horizontal dimension is given first, whether this is smaller or greater than the vertical dimension.  Alternatively, you can use the measuring tools within Adobe Photoshop (or other image editing software) to determine the dimensions.

research03

Card thickness – The thickness of the card mount is only practical to measure if you have the necessary equipment, such as a micrometer screw gauge, and is probably worth doing only for very detailed studies, e.g. of a particular studio.

01x 04x 09x

Portrait style – e.g. full length/half-length/head-and-shoulders, seated/standing, couple/group, vignetted, etc.

Setting – e.g. studio, outdoors, garden

17rx

Photographer – the name of the photographer and/or studio, as printed, stamped, written or embossed on the photo or card mount

Studio Address – the address of the photographic studio, as displayed on the card mount, including the county/state/province/country (Chapman codes in the UK, Country Codes as used by the NZSG) in separate columns

Subject – a brief description of the subject or subjects, e.g. woman and child, or elderly man in top hat

48x 05x 42x

Age(s) – estimated ages of subject(s), using a range to indicate uncertainty, e.g. 3-4 years, or aged 60-70 yrs, etc.

Date – estimated date that the portrait or photograph was taken, again using a range to indicate uncertainty, e.g. 1885-1895, or 1880s

research04

Annotations – full transcripts of any annotations on the card mounts, or on the album pages where the photographs were, including negative numbers

Remarks/Notes – Any other remarks about the photograph, subjects or studio background worthy of note, including possible interpretations by the researcher

Some tailoring of the photograph index will usually be necessary for the researcher’s specific purposes.  However, any design should be carefully thought out, with consideration being given to the information which will be required, not only for the analysis of the album contents, but also for the proper citation of photographs.

Citation of Photographs

The citation styles for photographic images, of which there are several, are usually designed to cater for other works of art as well, and are therefore rather generalised.  The popular ones (MLA, Chicago, Harvard, APA) follow similar lines, and contain the same essential elements, which are:

  • Name of Creator and role, e.g.
  • Title or Description of Image
  • Year of Composition
  • Medium
  • Current Location e.g. Name of institution where currently held, Private Collection of [name], etc.

and if the image is reproduced in another work, such as a book, the following additional elements are used:

  • Title of Publication
  • Author or Editor of Publication
  • Location & Name of Publisher
  • Date of Publication
  • Page number

or on a web site:

  • Online Database Name or Web Site
  • URL
  • Date Accessed

The APA style for works of art in general is given as follows

Artist (last name, first name), artist’s role (in parentheses i.e. Artist, Architect), title, the work type, in brackets [Painting, Cathedral, Chair], country of origin or city, and state, and repository.

Adapting this specifically for photographs, one might therefore produce the following citation:

Pifer & Becker Photo-Palace (Photographic Studio) (estd. c.1887-1895) Portrait of a young man [Photograph], 94-100 Wilshire Building, Superior St, Cleveland, Ohio, U.S.A., Personal collection of Brett Payne, Tauranga, New Zealand.

The excellent NLM Style Guide provides a detailed description of how to cite photographs, which includes additional elements such as the size of the photograph, and makes the following important suggestion:

Prints and photographs often contain little information to use in constructing a citation. A formal title may be absent and publishing facts unclear. Therefore, include in a citation, whenever, possible the name of a library or other public archive where the item may be found, along with any order or catalog number available.

So I would suggest that the following additional elements should therefore also be considered for inclusion:

  • Size of Photograph and Mount or Frame
  • Collection Catalogue or Reference Number

There is a large variety of reference management software available, but it is beyond the scope of this article to discuss them in any detail.  Wikipedia has a good comparative study summary here.  I only have limited experience of a couple, specifically the MS Word add-on EndNote (at $300 very expensive, unless you can get a student discount) and the Firefox/MS Word add-on Zotero (a free download).

I would strongly recommend that those who reference photographs (or any other sources, for that matter) regularly in the course of their writing investigate the use of reference management software.  As a “mature student” who has recently returned to academic life after an interlude of 25 years, I was astounded at how simple it makes life when writing up any research that requires formal referencing.  I haven’t yet set up my EndNote styles to include photographs, but intend to do so for this album project, and will cover that in a separate article at some stage.

Prints of Photographs

Scanned images are very useful for examination of photographic detail, and have the advantage that they may be handled repeatedly without fear of causing damage to the originals which have been stored safely back in the album.  However, nothing beats having actual photographs to shuffle around the table while one is researching timelines, or assessing whether the subject of one portrait is an older version of the subject of another.

research05

Having proper prints made of dozens (if not more) of images can be a costly exercise, and I use a far simpler and cheaper, if somewhat rough and ready, method.  I simply print them out on ordinary paper using the very basic Windows Photo Viewer/Print function and a black-and-white Laser printer.  Choose the “9x13” print option for cabinet cards (resulting in four images to a page) and the “wallet” option for CDVs or tintypes (nine/page), and they will be very roughly the right size.

research06

I then cut out the prints, leaving margins to write reference numbers and date estimates.  Granted, it’s not quite the same as using the originals, but I have the satisfaction of knowing that the originals are safe, and I have reasonable facsimiles to annotate and play around with, at a fraction of the cost of having photographic prints made.

References

Quick Guide to Citing Images, Weill Cornell Medical College in Qatar

Citing Images, University of Cincinnati Libraries

Walli, Gaylin (n.d.) How to Cite a Photograph, eHow.com

How to Cite Electronic Sources, The Library of Congress

Citing Medicine: The NLM Style Guide for Authors, Editors, and Publishers, U.S. National Library of Medicine

Comparison of Reference Management Software, Wikipedia

Friday 18 June 2010

Don't argue, the lady has a gun!

The expressions on the faces of my teenage daughters when I mentioned last night that they had an Auntie Latifa was a little incredulous, for the most obvious of reasons. They'd only ever come across one Latifa before, on the television screen. Actually, it's not quite accurate - Latifa was a younger sister of their great-grandmother, and therefore their great-great aunt.

Image © and courtesy of the extended Binnie family
Latifa Middleton and Gamila Binnie,
standing next to the cannon Mons Meg,
Edinburgh Castle, Scotland, June-July 1932
Image © and courtesy of the extended Binnie family

When I asked them if they wanted to see a photograph of her, their eyes took on that "what-ev-a" expression so familiar to me when the topic of family history is raised, and the conversation moved on. However, a photograph of sisters Latifa and Gamila is particularly appropriate to display this week. Latifa's youngest daughter Madeleine and her husband Bill have just made their first, long planned "pilgrimage" (from California) to the country (and village) where Latifa and Gamila were born and grew up.

Courtesy of Find My Past's recent World Cup Widows temporary free access offer (presumably widowers and sundry atheists allowed too), I was able to discover more about the visits that my wife Gill's grandmother, Latifa and their sister Farida made to the United Kingdom in the 1920s and 1930s. The passenger lists that I've found give details of the family's inter-continental movements, providing a solid framework on which to arrange the anecdotal stories which have been handed down. I've written about this over at my other blog La Diaspora Continua.

According to the notes that I made from discussions with Gill's Aunt Maud when I scanned her collection of old photographs in 1998, the photograph was taken in Edinburgh in 1933. Maud's mother was then heavily pregnant with her fifth and last child John, who sadly died at the age of only two. Using the passenger lists mentioned earlier, I've been able to correct that date a little, and narrow the trip down to a six week period in June and July 1932.

Image © and courtesy of Peter Stubbs
Mons Meg and the view from Edinburgh Castle,
A 19th Century engraving
Image © and courtesy of Peter Stubbs & EdinPhoto

Having visited Edinburgh Castle with my sister on a rather dreary day in August 1987, I vaguely recall seeing cannons, but can't remember any details. However, Peter Stubbs on his excellent EdinPhoto web site has a Mons Meg page with several images of this particular enormous example reproduced from postcards from soon after the turn of the century, and a slightly older engraving (reproduced above).

Image by Yatton courtesy of Wikipedia Commons
Mons Meg, Edinburgh Castle, Scotland
Image by Yatton courtesy of Wikipedia Commons

More recent photographs, of which there are hundreds on Google images, show Mons Meg mounted on a very different wood and metal carriage, which is believed to approximate the original carriage construction. It appears that the mounting was changed some time between Latifa and Gamila's visit in the summer of 1932 and another snapshot of some children sitting on the cannon taken c. 1945.

Image © star1950 courtesy of East Lothian Museums
Mons Meg, Edinburgh Castle, Scotland, c.1900-1910
Image by star1950 courtesy of East Lothian Museum

Photographs of such pilgrimages play an important part in the establishment of links between us and the lands of our forebears, as well as in the maintenance of contact with distant cousins. Sometimes they are the only tangible references that we have to pass on to our descendants. When we visited Lebanon in 1997 we took hundreds of photos, and I'm sure that Madeleine and Bill will share some of theirs too, in due course. I hope they will be appreciated by those generations to come, and will perhaps encourage our descendants to learn about the lands that shaped their ancestors, perhaps even to make their own pilgrimages.

I intend to discuss this aspect of photographs in our family collections in due course, and how they may be combined with other documentation to provide a better sense of connection with one's ancestors. I will also be illustrating several examples from my own family collection over at La Diaspora Continua.

References

Mons Meg by Wikipedia

Bombards: Mons Meg and Her Sisters (Royal Armouries Monograph)

Monday 14 June 2010

Researching a photo album: (1) A digital photographic and scanned record

Caveat: I'd like to point out that I am not a trained conservator, and the practices that I describe in this article are merely those that I have judged most suitable for my purposes, although I do try to follow best practice, as far as I can determine. I would welcome suggestions on how to improve the procedures that I describe below.


In the previous article I provided some background to an old photo album donated by blog and web site reader Jack Armstrong from Pennsylvania.

Of course the first thing I do with an album, whether it is one belonging to a family member or one that I have purchased for my collection, is to quickly page through it to see what treasures it contains. Once my initial curiosity's been satisfied (usually several times over) it's time to start the very important process of documentation. To examine the photographs properly I usually find it necessary to slide them out of their sleeves, and so it's vital that I first have a accurate and complete record, right at the start, of where everything belongs. It's important to keep the photographs in their correct order, particularly if there is any writing on the album pages but, even if there aren't any captions, the order may prove to be important in determining who the subjects are.


The equipment I use includes a flat table or mat, an A2 sheet of thick white paper or card, a pair of clean white cotton, lint-free gloves, a soft brush, a spatula with a thin blade, a digital camera, a flat bed scanner and, if necessary, a USB memory stick. I have a Kodak DX7590, which is a mid-range 5 MP camera with 10x optical zoom, several years old and perhaps in need of replacement, but quite adequate for these purposes. Any camera will do, as long as you are able to focus close enough and provide a sufficiently detailed image.


Using the sheet of white paper or card as a background, I photograph the front, back and sides of the album from various angles, showing any special features, such as the catches, embellishments, maker's marks, damage etc. The background is white merely for convenience - the important thing is that it is plain (or unpatterned) and uniform so that (a) it does not detract from the album itself, and (b) so that it can be digitally removed at a later stage without too much difficulty. I find it best to take the photographs indoors during the daytime in bright, but indirect, natural lighting conditions. I try to avoid using the flash, as it often causes unwanted reflections and washes out or otherwise changes the colours.


Then I take photographs of each double page of the album, laying it open flat in the centre of the white area, photographing from directly above, and making sure that my shadow doesn't fall within the field of view. If there are any loose photos, I take a shot first with them in situ, and then again with them removed. When done I make a quick check to see that all of the shots are focused and have come out okay, and then retake any that are not up to scratch. I download all of the images to my computer, using the standard Windows 7 import utility that starts automatically as soon as I connect via the USB cable and switch on the camera, rather than the cumbersome Kodak Easyshare software that came with the camera and failed to manage the transfer to Windows 7. If necessary, I renumber the images of the pages so that they reflect the sequence that they appear in the album, rather than the order in which they were taken.


I try to back up the files regularly on an external hard drive, and then less frequently onto DVDs, but I also often upload them to an online album, particularly if I am sharing the research with family or other researchers. For this exercise, I find the Picasa 3 utility (available as a free download) very useful. Once an online album has been set up, uploading a group of images is a very simple process achieved in just a few clicks. It is possible to specify an album as private (viewable only by yourself), restricted (viewers by invitation only) or public (with a public listing).


Before the actual photographs can be scanned, they must be removed from the album. Nineteenth century photo albums were not designed with removal in mind, and some care is usually required to ensure that already fragile album pages are not damaged or, worse, the actual photographs themselves. I use a thin metal spatula - not a knife - inserted very carefully into the sleeve opening. With some delicate manoeuvering, the photograph will usually slide out by gently pushing with the gloved fingers of the other hand.


Note that there is often (although not always!) a sheet of loose backing paper between the back of one photograph and the back of the other photograph on the other side of the album page. The trick is to get the spatula between the photograph on your side of the page and the backing paper itself (see image and diagram above). Otherwise the backing paper tends to stick to the photograph when you try to slide it out and, if you proceed, it often catches on the edges of the hidden thick card, crumples and creates quite a mess, with the photograph getting stuck in the process. When in doubt, I leave it where it is and scan the photograph in situ, rather than risking any damage.


After brushing the photo lightly to remove any loose surface dust, I scan the photographs in the order that they appear in the album, only removing as many at one time as will fit on a single scanner platen. My scanner is a fairly recent, but low end model (Canon CanoScan LiDE 200) which I find quite satisfactory for the job. As most texts and photo scanning gurus will advise, it is always best to scan in full colour at the highest optical (rather than interpolated) resolution that your scanner will manage, and of course that your storage media will cope with.


It's also advisable to save the files in raw TIF format in the first instance. Copies of these TIF files may then be saved as or converted to JPGs for ease of handling. Alternatively your scanner software make make it easy, as mine does, to save in both formats at the same time. I don't want to get into a detailed discussion of image file formats here, but for a quick comparison, I have constructed a brief table - to be used as a guide only - to demonstrate the difference in files sizes for scans of typical cartes de visites and cabinet cards using various scan resolutions and the two file formats. It is obvious that TIFs are between 10 and 25 times the size of JPGs of the same resolution. Unless using a PC with a fairly powerful processor, it is very tricky working with 1200 dpi scans of cabinet cards saved as high quality TIF files. For many purposes copying/converting them to 600 dpi JPGs will be quite sufficient, and if you need greater detail, you can always return to the originals.


At this stage, I would strongly recommend that, if you're planning a project of this kind and haven't done so already, you acquaint yourself thoroughly with the user manual of your scanner before you start. The documentation these days is usually onscreen rather than print, but don't let that put you off, and if you insist on having a hard copy version (and chopping down a tree or two for the convenience) there may even be a handy "Print this Manual" option.


In my experience, it's not a good idea to succumb to the temptation of using any of the buttons on the scanner itself. They are, at best, clumsy tools, offering little or no ability for the user to manipulate output! Instead, it's far better to operate the scanner from within the software which came with the scanner. In my case the scanner driver is called ScanGear but there are many others. There's no need to be afraid of the "Advanced Mode" button/tab either - it's there to be used and "Advanced" does not necessarily equate with unintelligible. Learn what all the controls are, and how to obtain exactly the image you want every time, and you won't have to repeat the whole exercise again some months down the line. Using the ScanGear interface in the image above as an example, the most important features to be familiar with are:
Colour Mode - Always use the full colour, rather than black-and-white, option even if scanning monotone photos, because the colour scan will pick up many subtleties that a B&W scan will not.
Output Resolution - Choose between 300-1200 dpi to suit your requirements
I don't usually bother to use any of the "Image Settings" except Auto Tone, which is switched on by default. Most of the actions represented by these features can be achieved at a later stage using image editing software.


I scan each photograph on the platen with separate crops, making sure I include the full extent of the mount. I always scan both front and reverse, although if the back of the card mount is completely blank, then I will use a lower resolution, merely for record purposes. I find it wise to check the back carefully, though, as old pencil marks may be very faint or completely rubbed out, leaving only a slight impression on the surface, sometimes best revealed by viewing at an angle to the light.


File naming is, I suppose, a matter of personal preference, but is often made unnecessarily complicated by the scanning software defaults. I prefer to keep it simple, numbering from 001 upwards for each new album or group of photographs, and saving scans in separate folders in a heirarchical arrangement with simple, descriptive names, as shown above. You don't need separate names for JPG and TIF files, even if they are stored in the same folder. Scanned images go straight into the "scans" folder, while I use the "images" folder for digitally manipulated images. It is a simple matter, then, to back up the two sub-folders containing original scans - "JPG 600dpi" and "TIF 1200dpi" - onto USB memory stick, an external hard drive, DVD, or online repository. I use several back up methods, including a handy, pocket-book-sized external HD, DVD and Windows SkyDrive. The USB memory stick I generally keep for transferring files between computers.


As I did for the photographs that I took of the album pages, I upload smaller versions of the scanned images to a Picasa Web Album, mostly for sharing with other researchers. While creating the smaller images, I generally do some tidying up of the scans in Adobe Photoshop as well. First I rotate the image so that the card mount edges sit square within the image, depending on how accurately I've placed the card on the platen, this could be between 0 and 2 degrees. Not enough to be worth bothering with, you might think, but it does make a difference to the appearance when you use images subsequently in documents or web pages. It's a bit fiddly until you get the hang of it, but worth the extra effort. I also crop the image to the edges of the card mount. Edges are often uneven, or not quite square, so you will usually be left with some extra slivers of white space around the edges. This is where it pays to keep the white inside of the scanner lid nice and clean!

The next stage in my procedure employs Photoshop tools to manipulate the RGB levels, RGB curves, colour balance/hue and saturation. These tools are available in many other image editing packages, but their names may differ. My purpose here is not to enhance the image so much as to adjust the scanned image so that it, as faithfully as possible on my particular monitor (a ViewSonic VX2433wm), equates to my visual assesment of the photograph. To a certain extent, it replaces what the other control settings in the scanner software (referred to previously) are designed to cater for. The process is often iterative, learnt by experience, and I initially found it very time consuming while I taught myself exactly what each tool did. Now it's pretty much routine.


The most important elements to familiarise yourself with are:
1. Contrast stretching or Normalisation - A simple linear contrast stretch is achieved by adjusting the minimum and maximum sliders on the histogram of RGB levels to to lower and upper limits of the data distribution, as shown in the images above. This has the effect of increasing the range of tones displayed, without losing any data.


2. RGB Curves - I use this tool to adjust the contrast of the image. The simplest adjustment is to drag the centre of the line/curve up or down until the contrast is the same as that seen in the actual photograph. It is equivalent to merely adjusting the central slider on the histogram adjust tool, described above, to the left or right, but this method offers more options. Additional anchor points may be inserted at positions along the line and the curve manipulated accordingly to achieve a variety of effects, otherwise termed non-linear contrast enhancement.


3. Hue-Saturation-Lightness - Lastly I adjust these three settings until I have an image looking as near as possible to the actual photograph. Some experimentation is often required, and it may be necessary to return to steps 1 or 2 to adjust the tonal range/contrast to suit. This may not be how I eventually choose to present the image in a document or web page, but I feel it is important to first have a record of what it looks like now.

When the scans are tidied up and smaller versions uploaded to my Picasa Web Album, I then start the documentation process, which I will cover in the next installment.

References & Further Reading

Anon (n.d.) Using the Photoshop Levels Tool & Using the Photoshop Curves Tool, Digital Photography Tutorials, Cambridge in Colour.

Fisher, R., Perkins, S., Walker, A. & Wolfart, E. (2003) Contrast Stretching, from Image Processing Learning Resources.

Liu, J.G. & Mason, P.J. (2009) Essential Image Processing and GIS for Remote Sensing, Wiley-Blackwell.

Tuesday 8 June 2010

Researching an album from Cleveland, Ohio - Introduction

Image © and collection of Brett Payne

It's now almost a year since Jack Armstrong from Pennsylvania contacted me out of the blue, saying that he had for some years owned an old photograph album containing "a couple of dozen portraits," many of which were from the English Midlands, and several from my specific area of interest, the county of Derbyshire. He had purchased the album at a yard sale some years before, so he had no personal connection to the photographs.
It has been on a back shelf, collecting dust and guilt .... Somewhere out there is somebody to whom this would be a treasure. If you are interested in the album you can have it. I'd just like to see it find a safe home.
While searching the web for information about the photographers, he had stumbled across my web pages. To cut a not very long story even shorter, Jack very kindly sent the album to me (at a not inconsiderable cost to himself) and, apart from some initial investigations that I made last year, it's been gathering yet more dust and guilt (albeit Antipodean dust and guilt, rather than the North American variety) ever since.

Image © and collection of Brett Payne

Due to my study commitments over the last year, and with some embarrassment on my part, I haven't had the time to give the album the attention that I was intending. However, I've decided that it's probably worthwhile posting a run down of my initial work, and then writing further on progress in forthcoming months as I find the opportunity. At least this way I can acknowledge Jack's generosity and make a start on the study. I feel that my ongoing detective work into the album's original owner(s), and the subjects of the photographs contained within it, will benefit from exposure to a wider audience. While I don't claim any expert knowledge in the field, I'm also hoping that a detailed account of my discoveries during the course of my research may assist, in some small way, others delving into their own family collections. As always, I would very much appreciate feedback, comments, queries, constructive criticism, etc. along the way. Please feel free to question my judgement, conclusions, etc. - it's the best way for us all to learn from the experience.

Image © and collection of Brett Payne

Externally the album, as can be seen from the images above, appears to be in a rather distressed state. The original patterned plush olive velvet - of a style which was introduced and became common in the 1880s - is now threadbare and has split open at the edges, revealing the padding inside, some of which is doing its best to escape. While the binding between the cover and the album leaves has partly separated, the cardboard leaves themselves are largely intact. The album pages are constructed of double layers of dark green glossy card, printed in grey ink with a design including wild flowers and fairies. Tiny writing at the base of the design states, "PAT. APPLD. FOR 1887." Some of the individual photo sleeves are torn, as is often the case with these old albums, but most of the photographs themselves are in excellent condition. The album measures 220 x 275 x 85 mm externally, and has 18 pages.

Image © and collection of Brett Payne

There are somewhat more than "a couple of dozen" photographs. In fact, the album contains 55 of them, consisting of 26 cabinet cards, 22 cartes de visite, 3 sixth-plate tintypes (or ferrotypes) and three other format types, a couple of them rather battered, and several lying loose between the album leaves. All except one of these are portraits. One loose photo mount with a stylised flower art nouveau frame has lost its photograph. There is also a loose colour print of water lilies, apparently (from the text on the reverse, which relates to an adjacent, now missing, page) from an instructional book on water colour painting.

The next article will discuss the series of procedures that I always try to follow when starting out researching a photographic album.

Monday 7 June 2010

Move-O-Graph, The Live Portrait

Image © and collection of Brett Payne

Sadly, this example of a Move-O-Graph "Live Portrait" is missing half of the image, which means that it no longer "moves." I estimate that it was taken in the late 1910s or early 1920s, merely by the hairstyle and moustache, but I could be well out.

Image © and collection of Brett Payne

I've found very few examples of this style of portrait on the net.

Image © and courtesy of Stephen Herbert

In an article entitled Animated Portrait Photography Stephen Herbert quotes another article published in the Amateur Photographer in 1916 in which Living Portraits are described in rather sarcastic and derogatory terms. He also includes an example from his own collection. I can't find many references to this style of portrait, so I presume that they never became very popular.

Gif Created on Make A Gif

I've taken the liberty of trying to recreate the effect that this Move-O-Graph Portrait would have had by using an animated GIF. You'll have to be the judge of whether or not you would have wanted yourself preserved for posterity in this manner.

If any other readers have such Move-O-Graph portraits in their collections, I'd be keen to hear from you, particularly if their "movements" remain intact.

References

Herbert, Stephen (1989) Animated Portrait Photography, in History of Photography, Vol. 13, No. 1 (Jan-Mar 1989)

Sunday 6 June 2010

Dating photos with the aid of trade directories

Image © and courtesy of Durham University Library

I've recently been having another detailed look at an album in my non-family collection that I've been researching off and on over the course of several years. Within the album is a group of cabinet portraits taken at studios in Detroit, Michigan during the last two decades of the 19th Century. In an attempt to date the photos more accurately than my knowledge of clothing fashions would permit, I turned to city/trade directories, a good selection of which are now available on both Ancestry and Footnote. Sadly my month-long subscription to the latter is at an end, and I don't use it often enough for my own family research to really warrant a renewal. However, I have been able to build up a suprisingly detailed history of the photographic studios operating in Detroit. It's a valuable lesson to me as to how much it is sometimes possible to narrow down dates using this one method alone.

Image © and collection of Brett PayneImage © and collection of Brett Payne

Perhaps the first in the series, timewise, is this enchanting portrait of a young woman from the studio of J.E. Watson of 41 & 43 Monroe Avenue. The style of card mount design is typical of those produced in the mid-to late 1870s, but the portrait itself could be as late as the early 1880s.

Image © and collection of Brett PayneImage © and collection of Brett Payne

The next pair of photographs in the group are vignetted head and shoulders portraits of a young woman and a young man, both taken at the studio of Bracy, Diehl & Co. of 35, 37, 39 (or 35-39) Monroe Avenue. My initial estimate from clothing styles is that these two were taken at roughly the same time, perhaps in the early to mid-1880s.

Image © and collection of Brett PayneImage © and collection of Brett Payne

Although the text and colour of the ink on the front of each is similar, the colour of the card mounts is different, as are the intricate designs on the reverse.

Image © and collection of Brett Payne

This effect of this charming portrait of two young children, possibly brother and sister, has in my view been somewhat lessened rather than enhanced by the slightly asymmetrical diamond-shaped frame. The studio here is that of Bracy & Gibson of 246 Woodward Avenue, and the introduction of the finely scalloped, bevelled and gilded edges to the card mount suggest to me a date of the mid- to late 1880s, or perhaps early 1890s.

Image © and collection of Brett PayneImage © and collection of Brett Payne

This vignetted portrait of a rather wistful young woman by Diehl, Ladd & Co. of 246 Woodward Avenue is of a similar style to several of the others in the group, and could be from any time in the 1880s or 1890s. Unfortunately little of the woman's dress is showing, although the hairstyle, bodice and collar are perhaps more of an 1890s style than 1880s.

Image © and collection of Brett PayneImage © and collection of Brett Payne

Finally, there are three similar cabinet card portraits, all of young boys, by the studio of Angell & Diehl at 246 Woodward Avenue, only two of which are shown above. They are difficult to date but could be from any time in the late 1880s or early to mid-1890s. The style of the one on the right, of the younger child, feels to me more from the early 1890s.

A pattern is immediately apparent in the photographers and studio addresses: Diehl, Bracy, Monroe Avenue and Woodward Avenue are all common to two or more of the sets shown above. Peter Palmquist's comprehensive bibliography Photographers: A Sourcebook for Historical Research makes no mention of a collated resource for Detroit photographers, so I turned to the city directories. While these have proved a very handy, if somewhat sporadic, resource for my research into the studio photographers of Derbyshire, England, I haven't a great deal of experience in using them for other locations. However, Footnote.com has a very useful complete collection of digitised city directories for Detroit , Michigan from 1861 until 1923. Although time consuming to search, with a little patience one can eventually build up a decent time sequence, as I did.

1875
- no entries for Bracy or Diehl
- Bigelow Lyman G, photographer, 244 Woodward ave, h cor Duffield and Clifford

1876
- Bigelow Lyman D, photographer, 244 Woodward ave, h 262 2d
- Diehl Ambrose J, operator Lyman G Bigelow, bds 252 Woodward ave

1877
- Bigelow L D, photographer, 244 Woodward ave
- Diehl Ambrose J, photographer, rooms 98 Farrar

1878
- Bigelow Lyman D, photographer, 244 Woodward ave

1879
- Bigelow Lyman G, photographer, 127 park
- Bigelow & Taylor (Edwin B Bigelow, Elmer W Taylor), photographers 244 Woodward ave.
- Diehl Ambrose J, operator J E Watson, h 14 Barclay.
- Watson J E, 41 and 43 Monroe ave.

1880
- Bracy Frank C, photographer, G Watson, rooms 94 Gratiot ave.
- Diehl Ambrose J, photographer J E Watson, rooms 317 Jefferson ave
- Watson J E, photographer, 41 and 43 Monroe ave.

1881
- no entries for Bracy or Diehl
- Watson Joseph E., photographer, 41 and 43 Monroe ave, bds 264 1st.

1882
- Bracy Diehl & Co (Frank C Bracy, A J Diehl, A Lapham), Artistic Photographers 35 to 39 Monroe ave
- Bracy Frank C (Bracy Diehl & Co), rooms 39 Monroe ave.
- Bracy Lemuel, printer Bracy Diehl & Co, rooms 39 Monroe ave
- Diehl Ambrose J (Bracy Diehl & Co), h 113 Catherine
- Enright Miss Mary E, clk Bracy, Diehl & Co, bds 247 Jefferson ave.
- Gardner Eugene, clk Bracy Diehl & Co, bds 113 Catherine
- Lapham Abraham (Bracy Diehl & Co), h 67 Montcalm e.

1883
- Anthony Miss Josephine, finisher Bracy, Diehl & Co., bds 121 Porter
- Bracy Diehl & Co (Frank C Bracy, A J Diehl, A Lapham), Artistic Photographers 35 to 39 Monroe ave
- Diehl Ambrose J (Bracy Diehl & Co), h 200 Locust
- Coman Miss Annie S, clk Bracy, Diehl & Co, bds 45 Miami ave
- Lapham Abraham (Bracy Diehl & Co), h 73 Montcalm e.

1884
- Bracy Diehl & Co (Frank C Bracy, A J Diehl, A Lapham), Artistic Photographers 35, 37 & 39 Monroe ave
- Bracy Frank C (Bracy Diehl & Co), bds 79 Miami ave.
- Bracy Lemuel, printer Bracy Diehl & Co, h 143 Sycamore ave
- Colman Miss Annie S, clk A J Diehl & Co, bds 45 Miami ave
- Diehl Ambrose J (Bracy Diehl & Co), h 200 Locust
- Johnson Ralph, printer Bracy Diehl & Co, h 302 2d
- Lapham Abraham (Bracy Diehl & Co), h 671 Montcalm e.

1885
- Bracy Frank C, photographer, h 145 Sycamore
- Bracy Lemuel A, printer A J Diehl & Co, h 111 Catherine
- Colman Miss Anna S, clk A J Diehl & Co, bds 45 Miami ave
- Diehl A J & Co (Ambrose J Diehl Abram Lapham), Photographers 35 to 39 Monroe ave
- Diehl Ambrose J (A J Diehl & Co), h 109 Catherine
- Lapham Abram (A J Diehl & Co), h 74 Montcalm e
- Winiker Edward J, printer A J Diehl & Co, bds 120 Hastings

1886
- Bracy Lemuel A, photographer A J Diehl & Co, h 111 Catherine
- Colman Miss Anna S, clk A J Diehl & Co, bds 120 Miami ave
- Diehl Ambrose J (A J Diehl & Co), h 109 Catherine
- Diehl A J & Co (Ambrose J Diehl, Charles Merbach, Abraham Lapham), Photographers 246 Woodward ave
- Lapham Abraham (A J Diehl & Co), real est, h 651 Trumbull Ave
- Merbach Charles J (A J Diehl & Co), h 269 St Aubin ave
- Schmidt John, apprentice A J Diehl & Co, bds 326 Hastings
- Tromby Maxim A, retoucher, A J Diehl & Co, h 141 Adams ave e
- Winiker Edward J, printer A J Diehl & Co, bds 120 Hastings

1887
- Diehl Ambrose J (Diehl & Sharpsteen), h 109 Catherine
- Diehl & Sharpsteen, 246 Woodward ave
- Sharpsteen Samuel (Diehl & Sharpsteen) bds 250 Woodward ave
- Winiker Joseph E photographer Diehl & Sharpsteen, bds 120 Hastings

1888
- Ambrose J. Diehl, photographer, Bracy & Gibson, h 109 Catherine
- Bracy & Gibson, 246 Woodward av.
- Bracy Frank C (Bracy & Gibson), h 145 Sycamore
- Bracy & Gibson (Frank C Bracy, Jefferson J Gibson), photographers, 246 Woodward av
- Cowen Miss Ina, clk Bracy & Gibson, bds 346 5th.
- Winiker Edward J, printer Bracy & Gibson, bds 243 Croghan

1889
- Diehl Ambrose J, photographer J J Gibson, h 109 Catherine
- Gibson J J, photographer, 246 Woodward av.
- Ladd B W, photographer, 22 Witherell
- Bracy Frank C, h 658 Fourteenth av

1890
- Ambrose J. Diehl, 109 Catherine
- Ambrose J. Diehl, Burrell W. Ladd & Jefferson J. Gibson, 246 Woodward Avenue & 82 Gratiot Avenue, Photographers

1891
- Diehl Ambrose J (Angell, Diehl & Co), h 109 Catherine
- Angell, Diehl & Co, photographers, 246 Woodward av

1892
- no entries for Bracy, Ladd or Gibson
- Angell George R, photographic materials, 216 Woodward av.
- Diehl Andrew J [sic], removed to Grand Rapids, Mich.
- Earle Photo Co, 246 Woodward av.
- Ladd Burrell W, 173 Canfied ave e

Although the last Diehl entry in this list is for an "Andrew J," it seems likely this is a misprint for "Ambrose J." I discovered recently that Ambrose J. Diehl is the common factor between all of these Detroit photographs, and this was due to the simple fact that he was married to the sister of the owner of the photograph album. It seems likely that the album owner, her husband and children, as well as her sister and her children, were all photographed by Ambrose Diehl at one time or another. The Diehls did indeed move to Grand Rapids in the early 1890s, where they are shown living in Hastings Street in the 1900 census. They returned to Detroit around 1905-1906, where Ambrose continued to work as a photographer, but apparently as an employee rather than owner of his own studio.

Going back to the list taken from the city directories, I was then able to construct the following detailed timeline for Ambrose Diehl.

1876Diehl employed as operator in the studio of Lyman G. Bigelow, 244 Woodward Avenue
1877A.J. Diehl operated a studio at 98 Farrar
1878unknown
1879-1880Diehl employed as an operator in the studio of J.E. Watson, 41 & 43 Monroe Avenue
1881unknown
1882-1884In partnership with Frank C. Bracy and Abraham Lapham as Bracy, Diehl & Co., 35-39 Monroe Avenue
1885In partnership with Abraham Lapham as A.J. Diehl & Co., 35-39 Monroe Avenue
1886In partnership with Charles Merbach and Abraham Lapham as A.J. Diehl & Co., 35-39 Monroe Avenue
1887In partnership with Samuel Sharpsteen as Diehl & Sharpsteen, 246 Woodward Avenue
1888Diehl employed as a photographer in studio of Bracy & Gibson, 246 Woodward Avenue
1889Diehl employed as a photographer in studio of J.J. Gibson, 246 Woodward Avenue
1890Diehl in partnership with Burrell W. Ladd and Jefferson J. Gibson as Diehl, Ladd & Co., 246 Woodward Avenue & 82 Gratiot Avenue
1891Diehl in partnership with George R. Angell as Angell, Diehl & Co., 246 Woodward Avenue
1892Diehl sold business to Earle Photo Co. (inc. 31 Mar 1892) and moved to Grand Rapids, Kent, Michigan
1893-1905Worked as a photographer in Grand Rapids, status unknown
1906Diehl employed as a photographer in studio of H.N. Imrie,
1907-1923Worked as a photographer in Detroit, status unknown

Perhaps Ambrose Diehl was a particularly difficult person to work with, as each of his employment periods and partnerships never seemed to last very long. However, I have noticed that many of the other photographers in Detroit show similarly fluid employment/business histories, so it seems more likely that it was just a rather cut-throat business to be in. The great benefit for us is that the names and studio addresses of the card mounts can provide quite specific dates for the portraits.

Image © and collection of Brett Payne
Cabinet card portrait of Ella Wheeler
probably taken by A.J. Diehl c.1879-1880, at the studio of
J.E. Watson, 41 & 43 Monroe Avenue, Detroit
Image © and collection of Brett Payne

The first portrait was therefore taken at Watson's Monroe Avenue studio, probably by Ambrose Diehl who was working there as a photographic operator from 1879 to 1880. Ella Wheeler née Winnett (1857-1924) married Byron C. Wheeler (1829-1891) at Blissfield, Lenawee County, Michigan in April 1878. Initially they lived in Grand Ledge in Eaton County, where their first son Maurice was born in July 1880, and it seems liklely that Ella had this portrait taken during a visit to her sister in Detroit, prior to the birth of Maurice. The hat is quite something!

Image © and collection of Brett PayneImage © and collection of Brett Payne
Cabinet card portraits of Ella and Byron C. Wheeler
Taken c. 1882-1884 at Bracy, Diehl & Co, 35-39 Monroe Avenue, Detroit
Images © and collection of Brett Payne

Ella returned to her brother-in-law's studio, where he was now a partner, with her husband some three or four years later, probably at around the time they moved to New London in Huron County, Ohio. She would have their second son Walter in 1886. The pose is almost identical, and Ella's fascination with decorative hats has endured.

Image © and collection of Brett Payne
Cabinet card portrait, possibly of Howard Diehl & unidentified sister
Taken c.1888 at Bracy & Gibson, 246 Woodward Avenue, Detroit
Image © and collection of Brett Payne

I believe that Ella's sister Lizzie Diehl sent her this portrait of her own two children around 1888, at which time Ella and her husband were running a saloon in New London. Ella had a second son Winnett, born in April 1888.

Image © and collection of Brett Payne
Cabinet card portrait, possibly of Lizzie Diehl
Taken c.1890 at Ladd, Diehl & Co., 246 Woodward Avenue, Detroit
Image © and collection of Brett Payne

I think that Lizzie sent this portrait of herself to Ella in 1890, the year that Lizzie had a third child Raymond, and Ella's second son Walter died.

Image © and collection of Brett PayneImage © and collection of Brett Payne
Cabinet card portraits of Maurice B. and Winnett W. Wheeler
Taken c.1891 at Angell & Diehl, 246 Woodward Avenue, Detroit
Image © and collection of Brett Payne

Ella returned to Ambrose's studio in 1891 for portraits of her two surviving boys, Maurice and Winnett. A third portrait with identical card mount from the album, shown below, appears to be of Lizzie's son Howard, then aged nine.

Image © and collection of Brett Payne
Cabinet card portrait, probably of Howard Diehl
Taken c.1891 at Angell & Diehl, 246 Woodward Avenue, Detroit
Image © and collection of Brett Payne

Ella's husband Byron died in April 1891, and after taking care of the saloon business Ella moved to live with her brother's in Montana around July. From the evidence of these photographs, taken c.1891 she may have gone there via her sister's in Detroit.


I was also able to find on the net several other photographs from the studios that Ambrose Diehl was associated with, and out of interest I've reproduced a selection of these here. Hopefully they will be of use to someone else trying to date a Diehl photo.

Image © and courtesy of DeadFred
Archie MacMillan, c.1882-1884
by Bracy, Diehl & Co., Detroit
Image © and courtesy of DeadFred

Image © and courtesy of grannyspalapa on eBay
Unidentified woman, c.1882-1884
by Bracy, Diehl & Co., Detroit
Image © and courtesy of grannyspalapa on eBay

Image © and courtesy of University of Michigan Library Repository
Unidentified woman, c.1882-1884
by Bracy, Diehl & Co., Detroit
Image © and courtesy of University of Michigan Library Repository

Image © and courtesy of grannyspalapa on eBay
Unidentified woman with children, c.1885-1886
by A.J. Diehl & Co., 35 to 39 Monroe Ave., Detroit
Image © and courtesy of grannyspalapa on eBay

Image © and courtesy of grannyspalapa on eBay
Unidentified woman, c.1885-1886
by A.J. Diehl & Co., 35 to 39 Monroe Ave., Detroit
Image © and courtesy of grannyspalapa on eBay

Image © and courtesy of grannyspalapa on eBay
Unidentified woman, c.1885-1886
by A.J. Diehl & Co., 35 to 39 Monroe Ave., Detroit
Image © and courtesy of grannyspalapa on eBay

Image © and courtesy of the NYPL Digital Gallery
Ed Hanlon, Detroit, c.1885-1886
by A.J. Diehl & Co., 35 to 39 Monroe Ave., Detroit
Image © and courtesy of NYPL Digital Gallery


Unidentified man with magnificent moustache, c.1892
by the Earle Photo Co. 246 Woodward Ave., Detroit
successors to Angell & Diehl


1892 Advertisement for Earle Photo Co.

References

City Directories for Detroit, Michigan from Footnote.com

Palmquist, Peter E. (ed.) (2000) Photographers: A Sourcebook for Historical Research, Nevada City: Carl Mautz Publishing, 154p, ISBN 1-887694-18-X

Federal Census of the United States from Ancestry.com
Join my blog network
on Facebook